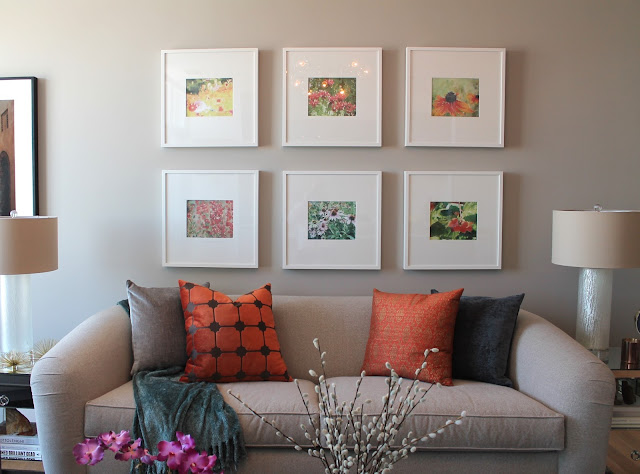
Our last project was a great exercise in the high/low mix. And, of course*, it turned out amazing. (*Read: our projects always turn out amazing.) One of the best money-saving techniques we used in the space was actually one of the strongest focal points - the gallery wall above the sofa.
Can you believe it, this gallery wall only cost a total of $250?! This is a fraction of the price you could pay for even one measly piece of art and in our opinion the look is so much more dynamic. Splurging on high-end art isn't totally necessary most of the time, and a gallery wall offers you greater flexibility to change out the images down the road if you feel the need for a changeup.
One of the big reasons we saved on this arrangement was because we went with simple IKEA Ribba frames. Each one only costs $20! If you've ever looked into pricing for custom framing then be prepared for a shock - it's super expensive and again not always worth it.
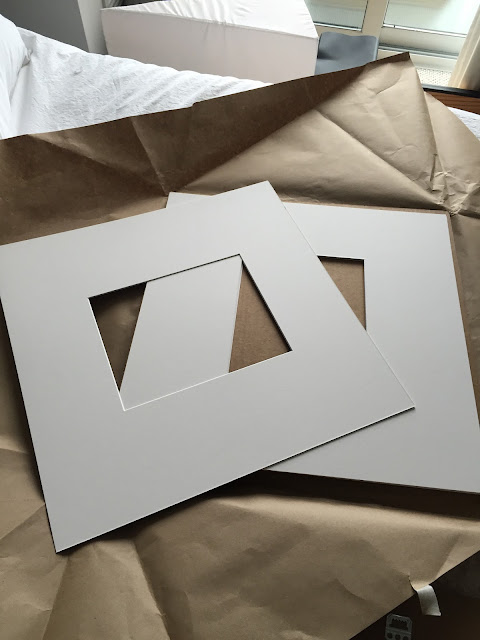
IKEA frames can be pretty easily recognizable and what we didn't like about the way they came "off the shelf" was the square mat opening. So, as a way to both disguise the fact that these were IKEA frames and to make them slightly more "custom" looking, we had custom mats cut at a local framing store.
The frames were cut to have a more rectangular opening, took no time at all for the store to do and each one was also only $20.
To fill the frames, our client had a beautiful set of photos she had taken herself with her own camera. She used a computer program to give them a beautiful watercolour effect, so we chose 6 that balanced well in terms of colour, subject, etc. and got them printed on card paper at our local Staples store for only $8!!!
Next, we taped the photos into the frames along with our new custom cut mats. Be careful here that your photo lies perfectly when you tape it - any bubbles or gaps will be way more noticeable once the frame is hung.
In fact, it is best to put tape not only at the corners but also around the edges of the image to be extra sure that no bubbles or gaps will be seen.
Before hanging the frames on the wall, we played around with the best arrangement for the 6 photos to be hung together. Again, a balance of colour, texture, etc. is key here. For example, there are three photos that contain a lot of red/pink/fuschia tones. They are the photos at the bottom left, centre top, and bottom right. They were dispersed evenly throughout the group so that there wasn't too much of the same colour in one area which would throw off the balance.
Sometimes our own level of good taste and expertise surprises even us!
Finally, find a guy with a hammer, tell him where to put your frames, have him whack some nails in the wall and hope that he followed your instructions properly. In our case, thankfully he did.
As I said earlier, art doesn't need to be expensive. Had we not gone with custom mats for these frames, this arrangement would have been even less expensive. Heck, throw your own scribbles into the frames and you can even save the $8 on photo printing. Live your own life.
To review, here is the cost breakdown of everything:
6 IKEA Ribba Frames - $120
6 Custom Cut Framing Mats - $120
Photo Printing - $8
Custom Gallery Wall Tailored to Your Exact Tastes - Priceless.
bZi


