Wednesday 27 March 2013

FAUX CEILING MEDALLION

Painted-Ceiling-Medallion.jpg

Allow me to introduce you to the faux-painted ceiling medallion. 

Faux-painted ceiling medallion, meet non-existent readers.

Some background
The apartment came chockfull of the most basic, cheap light fixtures available (popularly referred to as "boob lights"). 

Exhibit A: 


They had to go.

A huge part of making your living space personal is switching out any of the cookie-cutter basic fittings that you can. Switching a light is one of the easiest fixes and makes such a huge difference!

Unfortunately for us, taking down the existing light fixture left behind the most awful discoloured, yellowish stain - never rarely a good thing. This thing was like smokers' teeth yellow. 

Exhibit B:

Ceiling-Light-Stain.jpg

This too had to go.

A ceiling medallion may have been the obvious choice (repainting the ceiling was just not happening), but I didn't like the design of any of the ceiling medallions anywhere I looked - they are either way too ornate or just too chunky looking. I wanted to keep it minimal, so I thought WHY NOT JUST PAINT OUT THE CIRCLE BLACK, TO MIMIC A CEILING MEDALLION? The vintage metal pendant fixture I bought from Kijiji a few weeks ago was destined to go where this unfortunate stain was, and I knew that the fixture, cord and cap were all going to be painted black, so the leap seemed logical.

The process was actually harder than I expected. First of all, craning your neck and contorting your body to paint on the ceiling blows. Also, I thought I could just sort of "free hand" the existing outline of the yellow circle stain and move on. 

Here is what it looked like when I stepped down from the painting to have a look:

Paint-a-Ceiling-Medallion.jpg

Yikes. 

So I had to go back with a smaller brush and continually round that baby out. It took some doing, but I pretty much got there. 

The faux-painted ceiling medallion does a good job balancing the weight of the actual pendant with some substance on the ceiling. If you can imagine the fixture only hanging from the smaller cap, it just seems inadequate up there.

Faux-Ceiling-Medallion.jpg

I think this is a resourceful way to cover up similar stains if you run into the same problem somewhere you are renting. The BEST part is that you can just throw the ugly old boob light back up when you leave and no one will ever know the difference! 

Stain or no stain, I think it is a cool effect. I imagine the same application in bright, vibrant colours would look really awesome too, bringing an unexpected pop of colour to your often-overlooked ceilings. 

By the way - that lamp amirite? I rewired it with some basic lamp cord from Home depot, bought a cap and sprayed all of it with a high-heat black enamel spray paint. This was recommended online, to avoid wear and discoloration from the heat of the light bulb. It's not anymore expensive than normal spray paint, and doesn't give off any weird smell when the light has been on for a while. 

Word.

Painted-Ceiling-Medallion.jpg

An artsy b&w pic of the new lighting situation. 

I dig it. What do you all think?


bZd


Sunday 24 March 2013

GALLERY WALL


Gallery-Wall.jpg

Ch-ch-ch-check it out!

So I made this on the weekend (read: finally got around to hanging it on the wall). 

It was cheap and fast, just how I like it. 

Total cost you ask? About $35.

After Christmas, IKEA was having a 50% sale on their RIBBA Frames, so I went a bit nuts. This isn't even half of the frames I bought. But these already incredibly cheap frames were double the cheapness! So the total cost of these frames was around $30. Total steal. 

For the art, I bought a pad of manilla craft paper for $2.99, a cheap paintbrush and a tube of black acrylic paint and WERKED. IT. OUT.

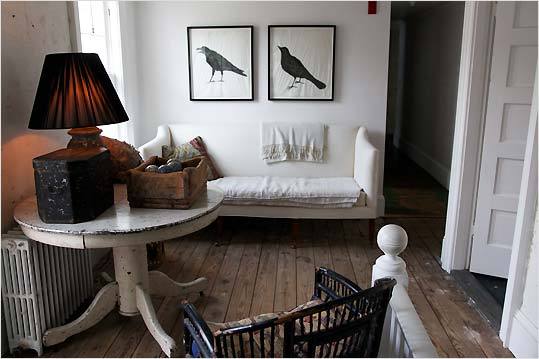
Two pictures I had posted on my Pinterest account had been stuck in my head for a while, and I desperately wanted to get some sort of gallery thing happening over the couch.

Vintage-Gallery-Wall.jpg

The first picture was an amazing collection of what I assume are old shooting range targets, grouped in a tight arrangement with all black frames. I love the circular repetition, and it incorporated just the right amount of black. The varying shades of the paper also really turned me on? 

Crow-Silhouettes.jpg

The next was of this pair of Edgar Allan Poe-esque raven silhouettes, that were beautiful in their simplicity.

I knew both could be easily DIY-ed, and because I liked both of them so much, I just smashed the two together into a clusterf&*k of paintings, threw them over my couch and called it a day.

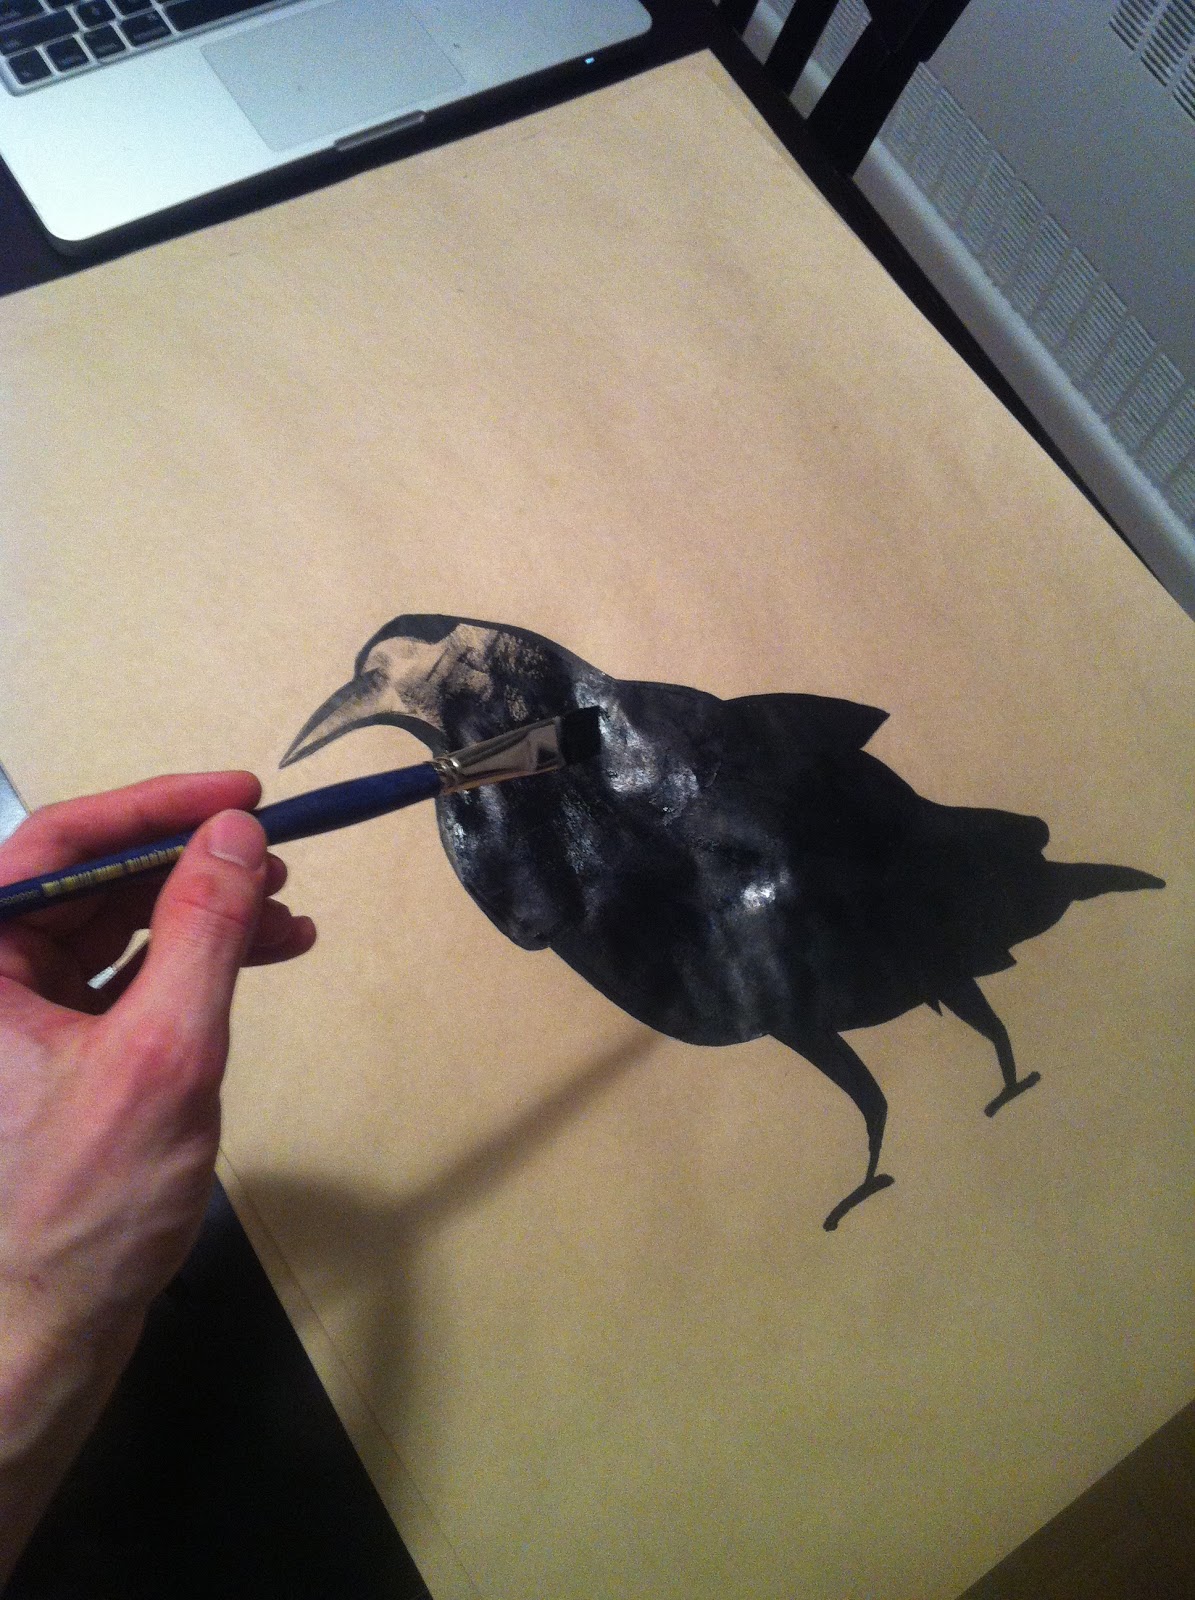
For those of you looking for a How-To, I really just Googled some crow silhouette images, drew them freehand and filled them in with black acrylic paint. With the circle art, I found that (for whatever reason) I still owned a geometry compass and used that to make some circles.

Paint-A-Crow.jpg
Look at me go! Just crankin' out MAGIC. 
Seriously, people do this for a living?*


(* I actually respect artists.)

With regards to the hanging, avoid the common mistake of hanging your art too high. ALWAYS hanging your art at eye-level. The pros suggest 57" for the vertical centre of whatever you're hanging - but you can generally eyeball it. For a gallery arrangement like this one, the spacing between each of the pictures is important. This I did measure carefully, and went with 4.5" between each. 

Here is a glare-y picture to give some context of how the arrangement fits on the wall. Hanging everything too high creates an awkward negative space between the top of the couch and the gallery. 

Stick to the rules and you should make it out of this OK.

Black-Frame-Gallery-Wall.jpg

What I did really like about the arrangement of targets though, was the idea of a black matte (instead of the traditional white) that highlighted some of the frames. 

I had more mattes than I knew what to do with, so I decided to risk one and spray paint it black. And guess what? It worked perfectly! I was afraid that it would seem uneven, or have weird paint speckles but it didn't. I even took this weird close-up picture for any haters out there! (Not a great picture, just take my word that it is perfectly smooth).

As always, the basics of spray painting still apply: APPLY MULTIPLE THIN COATS. Do not expect to cover it heavily in one go. But you know that by now, don't you?

Spray-Paint-Matte.jpg

Spray-Paint-Mat.jpg

Here is a ghetto over-exposed pic of me mid-way through spray painting the matte. Not sure why I took it.

Black-Frames-Gallery-Wall.jpg

I'm really happy with how it all turned out. No need to spend time looking around for art which is always way too expensive anyway. Stick it to the man and make your own!

Happy crafting.

bZd


Wednesday 13 March 2013

THE WANT: HERRINGBONE FLOORS

(via inquemode)

Oh how bad would I love the ugly parquet of our apartment be replaced by herringbone or chevron floors.

Let me count the ways...


Herringbone-Floor.jpg
1.

French-wood-floor.jpg
2.

Chevron-Pattern-Flooring.jpg
3.

Chevron-Wood-Floor.jpg
 4.

Herringbone-Wood-Floor.jpg
 5.

Chevron-Wood-Flooring.jpg
6.

These floors always remind me of a beautiful house I lived in in France for a short while. These patterns add so much more interest, rock and balls to your floors than your traditional straight and narrow flooring pattern. 

I think this look is best achieved when it has that rougher, rawer more rustic feel and so I think using less expensive, lower quality flooring would actually work in your favour. And I believe shorter floorboards are actually less expensive too, non?

Win win. 

                          Chevron             Herringbone


Also, though this post is titled "Herringbone Floors", some of the above pictures also feature "chevron" patterned floors. Above is a diagram for you to figure out which are which.

Good luck.

bZd


Thursday 7 March 2013

NEW METAL PENDANT


I bought this today. Thank you, Kijiji.

I have been dreaming of a metal pendant lamp for the dining room but they are SO DAMN PRICEY! Up popped this classic beauty on Kijiji for only $40!

The act of picking something up for purchase from an unknown stranger is never comfortable. This particular transaction took me to a part of Toronto that I wish to never revisit, and involved being asked to descend into a dimly lit basement of what I gathered was a restaurant that only sold chili. I paid my $40 quickly and left. I was offered chili.

Looking back, I probably should have bartered with these people because I now realize that there are no screws to mount this thing, and I only had their word to go on that in fact, the light worked. But I panicked, and from what I have described to you I'm sure you can understand why.

This girl doesn't stand two seconds before I spray paint her black. Like everything else. Black black black.


(image via here)

Barn-Pendant-Light.jpg

I'm hoping it will turn out like this lamp, from Restoration Hardware. (Theirs cost from $199-$499! Madness!)

Vintage-Metal-Pendant-Lights.jpg

I also plan to keep the insides white, to be completed 

Sexual.

bZd


Tuesday 5 March 2013

DIY BRASS FACEPLATES


Ugly-Faceplate.jpgReplace-Faceplate.jpg

Don't ever let your faceplates look like this. 

Faceplate shame.

The apartment had undergone what must have been one of the quickest and dirtiest paint jobs ever done before we moved in - even the light switches weren't spared. What's worse is that almost none of them matched, and this was a no-go for my Type A personality. 

What many people may not realize is that replacing a faceplate for a light switch or an electrical outlet is a) possible and b) the easiest thing ever. All you need is a screwdriver, and about 30 seconds. And no, it is in no way unsafe and there is zero chance you will electrocute yourself ... Then again I don't know you. 

But trust me, it's safe. You don't even need to turn off any breakers.

If anyone out there is even reading this thing, you may remember I had a recent epiphany over the idea of installing shiny, metallic faceplates throughout the apartment. 

And because I'm not a bitch, I went for it! 

Gold-Wall-Plate.jpg
(¯`·._.·(***AnGeL cHoIr***)·._.·´¯)

Cool right? Well, once again Home Depot pulls through and they actually carry these basic brass faceplates in store. And, they're only $2.99 each!

Here's all you need to get this project DONE.

Brass-Faceplate.jpgGold-Rustoleum.jpg
Faceplates, obviously, and Gold Spray Paint to spray the actual switch/sockets. 

A quick word on spray paint: don't cheap out on it. In my (and many others') opinion, Rustoleum is the only way to go. It is meant to be durable and will withstand the everyday wear of the switches/and plugs. I will be honest and say that I did first try to use a cheap spray paint (Krylon, in fact) my first try with this and it looked horrible. The coverage difference and the actual quality IS NOTICEABLE. 

Don't buy Krylon spray paint. Ever.

Paint-Light-Switch.jpg

This gloryhole-esque picture shows how I carefully covered a large area around the switch to be painted to avoid any excess overspray and misting from the spray paint. 

The protected area can never be big enough. Experience has taught me this. (I'm pretty sure I even cut a whole in a box, put it over the switch as well and sprayed inside that to collect even more of the paint spray.) Also, ALWAYS go lightly and in many coats with spray paint. 

Going too thick and all at once will only ever create dripping.

(...haha. But seriously.)

Brass-Faceplate.jpg

Here again is the same lovely image you have already seen, because as awesomely glam as this baby looks in person, it is extremely difficult to photograph without capturing any horribly distorted reflection of your hands. I have to tell you that in person they look AMAZE. It adds this really unique and unexpected sparkle, while kind of rocking this C3P0 Star Wars vibe.

This was my test pilot, and I will definitely be doing this to every light switch/socket in the apartment... I'll be sure to show in another post soon. When I go to move out, all I'll have to do is spray the switches/outlets back to white, and replace the horrible covers I found when we moved here. 

Maybe you don't want to go gold, but know that faceplates are a changeable accessory that you may forget about when wanting to add character to your space. Look around! There is lots out there. 

Perhaps you would enjoy something more like this:
                   
God help you if you do. 

bZd