This is our new bathroom. Lucky us.
ESS.
OH.
ESS.
Those tiles. That paint job... My elbow in the mirror.
The only salvation is the amazing original windmill mosaic tile floor. Total black-and-white score.
I knew I just couldn't support looking at that dirty salmon-y tile while I lived in the apartment. Like at all. I'm just that type of person. But that floor held so much promise and I knew there was a solution.
I had seen projects where people had actually painted over tile, and immediately sought this out as a possibility. Before the move-in, I had been drooling over this incredible bathroom by Jenna Lyons for a J Crew store in New York:
Wow!
So edgy, but still somehow traditional. I'm also in love with this all black bathroom by Brian Paquette:
The monochromaticism of this bathroom also spoke to me:
So, I knew I wanted a black and white scheme for the bathroom, and after reading some online DIY tutorials, it was off to Home Depot to pick up the supplies.
Materials:
Primer
2 pints of semi-gloss latex paint
Brushes
Paint tray
4" foam brush
Painter's tape (don't cheap out on this)
Ask your in-store experts about the brands they would recommend. We didn't really buy anything super high end. You will want semi-gloss paint rather than a matte finish to keep the shiny appearance of the tile, although I'm sure you could experiment with this. (Maybe a super matte finish could look really edgy?) We also bought a 4" foam brush to minimize the appearance of brush strokes, and our tiles happened to be 4" so a once-over with the foam brush on the final coat should smoothen things out as much as possible. Also, buying high-quality painter's tape is important - bleeding is a hassle and one that you should be willing to throw the extra couple bucks in to avoid.
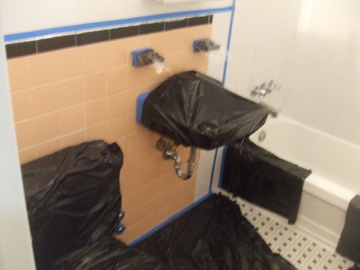
Here is what our bathroom looked like, getting all taped up. There was a weird discontinuation in the tile that I decided to mask with paint, between the sink and the tub. A botched repair somewhere in history, maybe?
Ya, we used sandwich bags over the soap and toothbrush holders. That's just how we roll.
You'll want to start by working with your brush between the tiles, where the grout is.
Here is a shot of what one coat of primer looks like (I think coat #2 may have already been started top left):
Here is what it looked like after two coats, already a huge improvement!
As with the primer, begin working the paint between the tiles, and smoothing it out as you go. Our bathroom is small, so I ended up going over each tile with our 4" foam brush, for maximal smoothness.
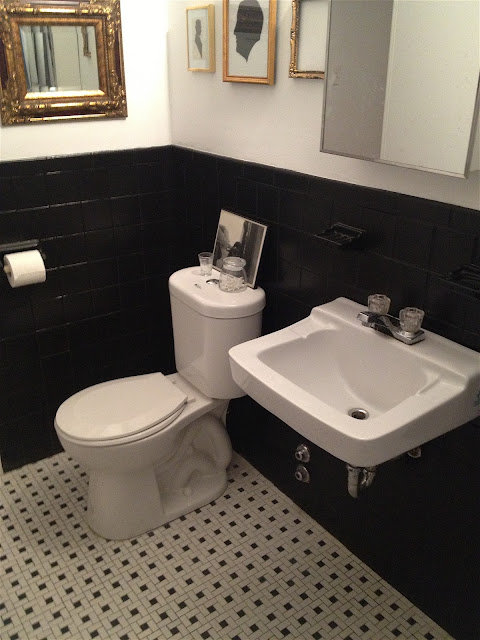
And here is the end result! I'm sooo happy about it.
And actually, going over that weird mash-up border zone of tile between the sink and the tub worked out really well after being painted. You can barely even tell the tiles are totally different sizes.
Of course, the grout is painted over so the whole thing is one uniform colour, but I kinda dig it. This project was really not that hard, it only took patience and some precision with the taping. Doing things right the first time will save you headaches later on.
The overall cost for this project was only around $50, but for such a phenomenal change. We kinda did this project without telling our landlord, but even he complimented on it!
You're welcome, sir.
bZd


